
목적
- Windows, Linux 운영체제를 실습하기 위한 하나의 환경을 구성한다.
실천 목표
- WSL2와 VSCode를 이용해서 OS 및 System Programming 스터디 환경을 구성한다.
환경 구성
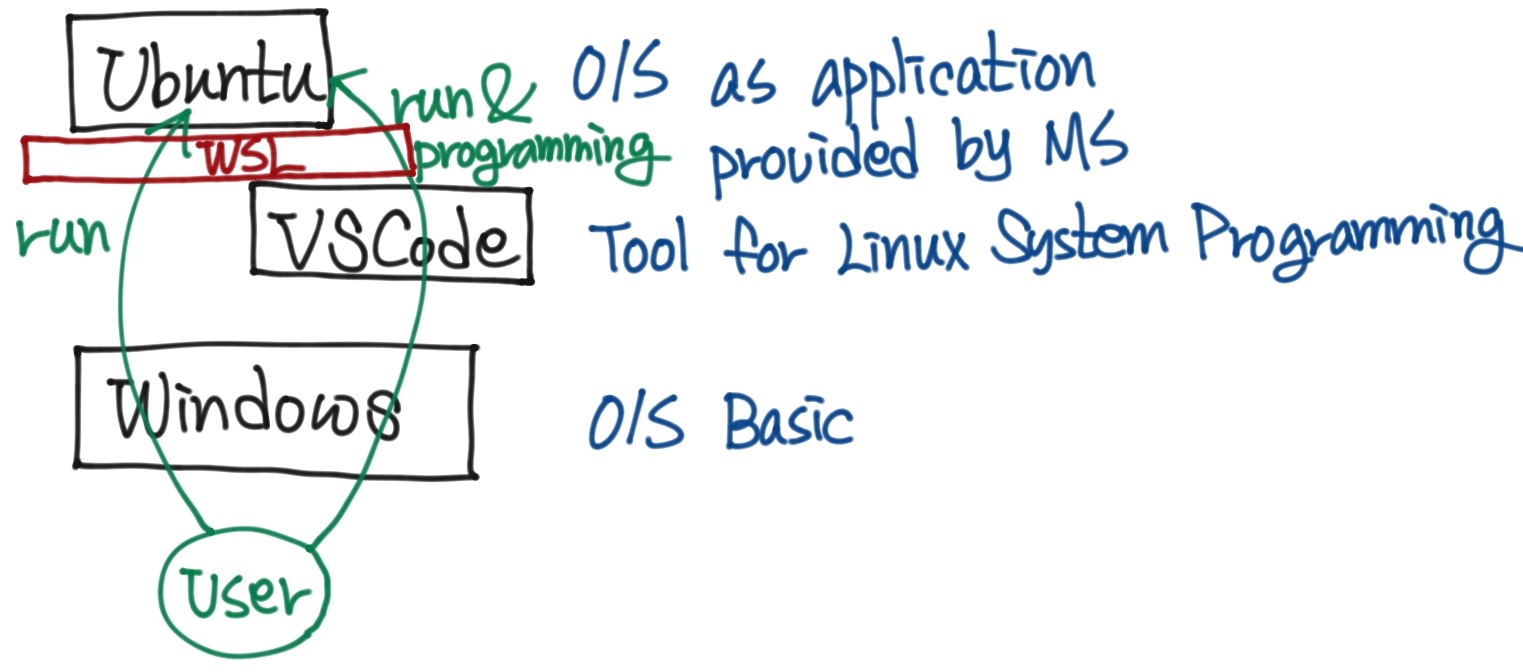
환경 구성도
![2022-09-04-os-getting-started-01]() Copyrightⓒ2022 Develiberta All rights reserved.
Copyrightⓒ2022 Develiberta All rights reserved.- 시스템 요구사항 확인 : Windows 10 x64
- 버전 1903+
- 빌드 18362+
- WSL 설치 과정 : WSL/가상머신 기능 켜기
- 설정 > 설정 검색 > “Windows 기능” 검색 > Windows 기능 켜기/끄기
- “Linux용 Windows 하위 시스템” 옵션 체크
- “가상머신 플랫폼” 옵션 체크
- 재부팅
- 설정 > 설정 검색 > “Windows 기능” 검색 > Windows 기능 켜기/끄기
- WSL2 설치 과정 : Linux 커널 업데이트
- x64 머신용 최신 WSL2 Linux 커널 업데이트 패키지 다운로드
- https://wslstorestorage.blob.core.windows.net/wslblob/wsl_update_x64.msi
- [참고]
- https://docs.microsoft.com/ko-kr/windows/wsl/install
- https://docs.microsoft.com/ko-kr/windows/wsl/install-manual#step-4—download-the-linux-kernel-update-package
- 다운로드한 패키지 설치
- x64 머신용 최신 WSL2 Linux 커널 업데이트 패키지 다운로드
- Linux 배포판 설치
- (시작에서 검색) Microsoft Store > 검색 > “Ubuntu”
- Ubuntu 20.04 LTS 버전 설치
- Ubuntu 20.04 LTS 열기 - 계정/비밀번호 설정
- WSL2를 기본 버전으로 설정
- PowerShell을 관리자 권한으로 열기
1
2
 PS C:\Windows\system32> wsl --set-default-version 2
 PS C:\Windows\system32> wsl -l -v
![2022-09-04-os-getting-started-02]() Copyrightⓒ2022 Develiberta All rights reserved.
Copyrightⓒ2022 Develiberta All rights reserved.
- PowerShell을 관리자 권한으로 열기
- Ubuntu에서 GNU 툴체인 설치
- 시작 > Ubuntu > Ubuntu 커맨드창에서 GNU 툴체인(gcc/g++/gcb 등의 컴파일러 등의 개발도구들) 설치
1
2
3
4
5
 $ sudo apt-get update
 $ sudo apt-get install build-essential gdb // build-essential로 gcc/g++/make 등이 설치됨
 $ gcc --version
 $ g++ --version
 $ gdb --version
- 시작 > Ubuntu > Ubuntu 커맨드창에서 GNU 툴체인(gcc/g++/gcb 등의 컴파일러 등의 개발도구들) 설치
- Windows에 VSCode 설치
- https://code.visualstudio.com/download 에서 User Installer 64 bit 다운로드
- VSCode 설치 진행
- VSCode에 Remote - WSL 확장팩 설치
- 확장 > 검색 > “Remote” 검색
- “Remote - WSL” 확장팩 설치
 Copyrightⓒ2022 Develiberta All rights reserved.
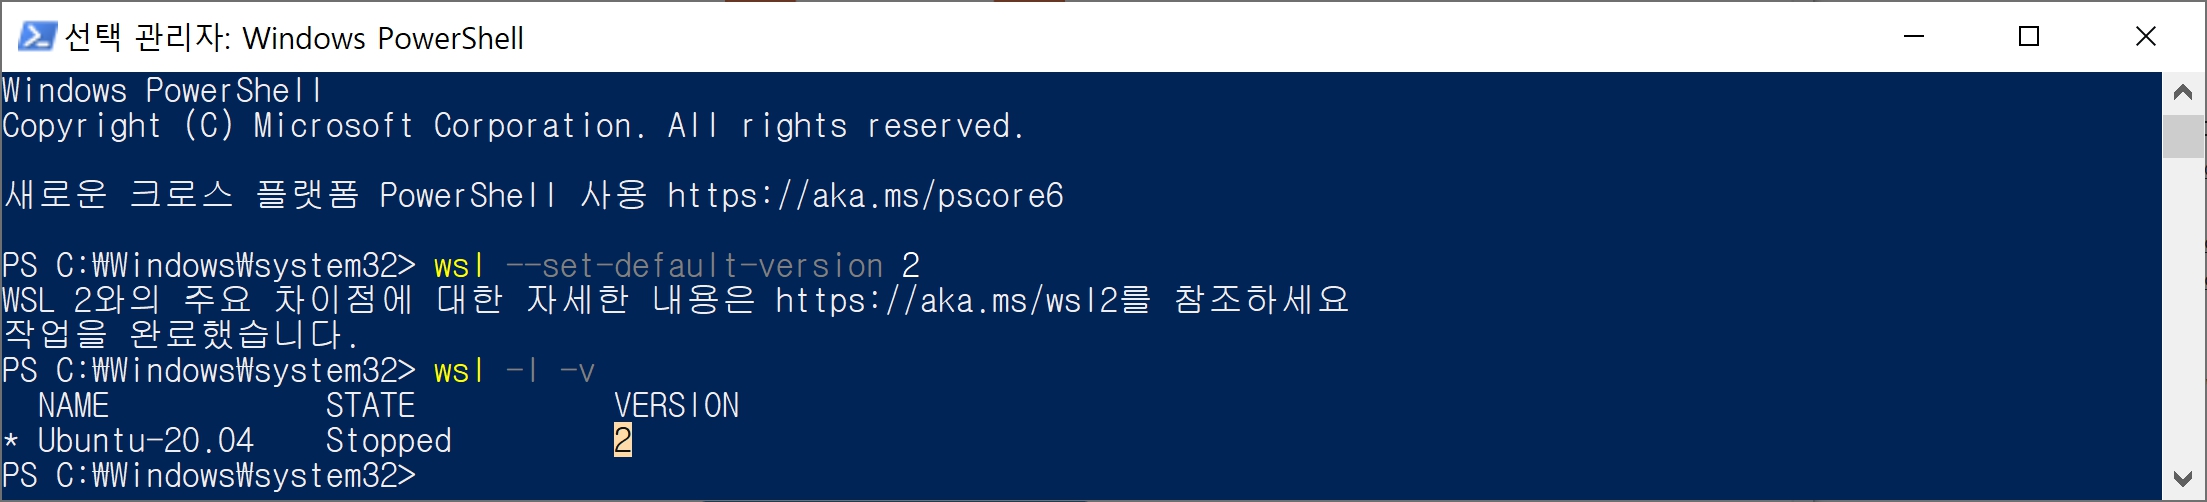 Copyrightⓒ2022 Develiberta All rights reserved.
접속 : Windows에서 VSCode 이용해서 Ubuntu에 원격으로 접속
- VSCode 좌측 하단 구석에서 “원격 창 열기” 아이콘 >< 클릭
- “Remote - WSL: New Window” 또는 “New WSL Window” 선택
- 좌측 탐색기 > 폴더 열기 > 홈 디렉토리가 열림 > (Ubuntu에서) 새 디렉토리 만들고 경로 잡은 후 연결
테스트 : 리눅스 시스템 프로그래밍
- hello_thread.c 파일 생성 (C/C++ Extension Pack 플러그인 팝업이 뜨면 설치 진행)
1
2
3
4
5
6
7
8
9
10
11
 #include <stdio.h>
 #include <unistd.h>
 #include <sys/wait.h>

 int main()
 {
     pid_t pid;
     pid = fork();
     printf("Hello, WSL!\n");
     return 0;
 }
- (상단 View 메뉴에서 Terminal 을 선택해서 나타나게 한 후) hello_thread.c 컴파일
1
gcc -pthread hello_thread.c - 컴파일된 파일 실행
1
./a.out![2022-09-04-os-getting-started-03]() Copyrightⓒ2022 Develiberta All rights reserved.
Copyrightⓒ2022 Develiberta All rights reserved.
 Copyrightⓒ2022 Develiberta All rights reserved.
참고
- 운영체제 공룡책 강의 | 주니온 | 인프런 https://www.inflearn.com/course/%EC%9A%B4%EC%98%81%EC%B2%B4%EC%A0%9C-%EA%B3%B5%EB%A3%A1%EC%B1%85-%EC%A0%84%EA%B3%B5%EA%B0%95%EC%9D%98/dashboard